Capturing photos on your phone – our tips for taking great social media pictures on the go
Aimée Colley
Designer at Shaw

Using photos on social media can really boost your engagement, easily showcase what you’re up to, and is an easy way to fill your content calendar.


Sources for stats: Webdam, Forbes and Buffer.
Whilst having a shoot with a professional photographer can be a great asset (see our blog on briefing a photographer here) it’s not really possible to have someone on site to capture what’s happening day to day, especially if you’re based in multiple locations. That’s where you, or your fellow staff members come in. You’re perfectly placed to catch the action and can easily snap some pictures as you go. If you’re not confident enough to start taking photos immediately, have a read through our tips for taking great social media pictures on the go…
Think about the format – landscape or portrait.
Usually, we’d recommend taking photos in a landscape format as it gives more flexibility on how the shot can be used afterwards. But if you’re taking photos specifically for Instagram Stories change your photo ratio to ‘Wide crop (16:9)’.

Catching the action.
Capture interesting moments that give context to the project you are working on. If you are photographing people, aim for action shots (rather than traditional posed photographs) as candid moments often look more natural and can work better for social media posts.
Focus on the subject.
This can usually be done on a smartphone by tapping on the area you want to focus on or use a ‘Portrait mode’ if you’re taking a photo of a person. But use portrait mode wisely and correctly – it’ll often focus on a person and blur the background nicely, which works great for staff photos but not so well if you’re photographing an object and you’re still in portrait mode.
Explore different modes:
If the subject of your photo is moving, use burst mode. Your phone will capture lots of photos, increasing the chance of capturing something in focus. If it’s dark, change to a night mode which should take a photo with a longer exposure, ensuring you capture a clear photo.

Get the light right.
You can usually adjust the colour balance by tapping on the area you want to light, and the settings will adjust automatically. If taking a photo indoors try to take the photo near a window so you’re using natural light rather than harsh overhead lights.
Consider the time of day and the weather:
If you have a window of a few days in which you could take photos, try to pick a sunnier day as blue skies and lots of light will really help improve any photos. If the weather isn’t great, don’t worry, just try to pick a spot in the day where things are less overcast or follow the other tips above on lighting.
Consider different heights.
Instead of just taking the photo straight on, consider whether the photo might be improved from reaching up or crouching down.
Consider the subject and composition.
Assess your subject and consider how close you need to be to capture it well. A basic rule of photo composition is the rule of thirds, which involves using dividing lines to break your frame up into a nine section grid. You can then use the grid in a few different ways either; positioning the subject of the photo in one of the intersect points, keeping the horizon straight, or to evenly split landscape content between the three thirds.

Switch on gridlines:
Don’t just imagine the grid lines are there – actually turn them on in your camera settings so you can perfectly follow all the rule of thirds tips above.
Don’t use the zoom.
When you zoom in your photo loses quality. Instead, move nearer the subject or just crop the photo later. The exception to this is if your phone has a wide-angle option you can toggle onto. Or some phones will have additional sensors to accommodate wide angles or macro shots (with extra small detail). Play about and see what’s possible with your device.
Try simple edits.
If the photo is quite busy but there’s a central focus, crop it. Your phone might make some suggestions of how you could edit your photo – but if you aren’t happy with the pre-set suggestions, try adjusting the brightness, contrast, saturation, or sharpness. Avoid over-editing, as it can lead to unnatural-looking photos. Try to edit all your photos in a similar way, so they look consistent.
Some phones, like the Google Pixel, offer a ‘magic eraser’ feature:
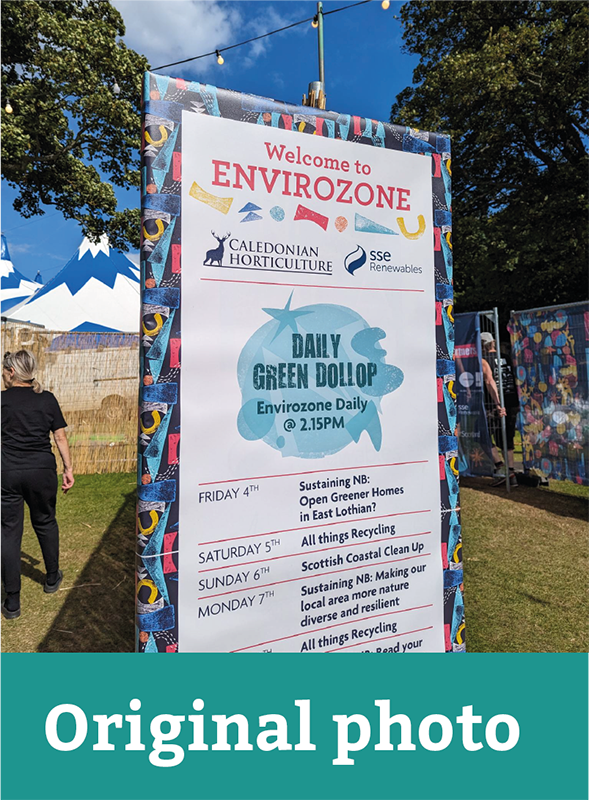
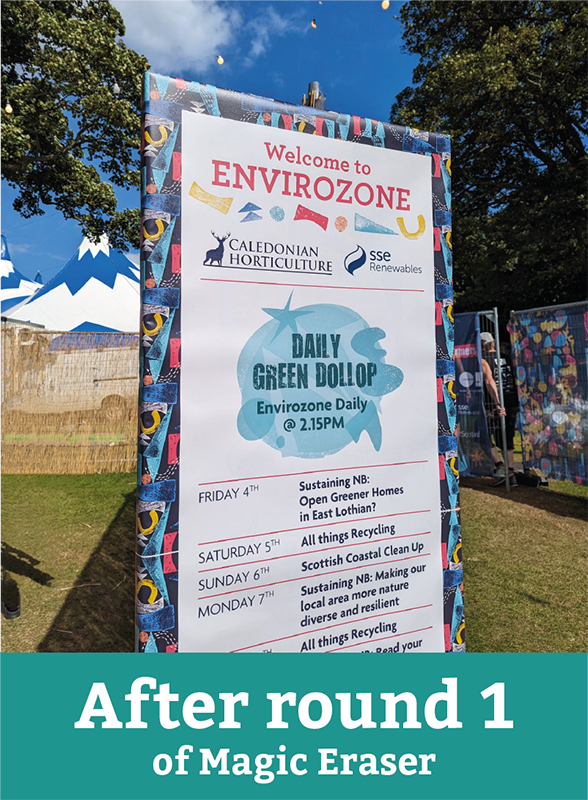
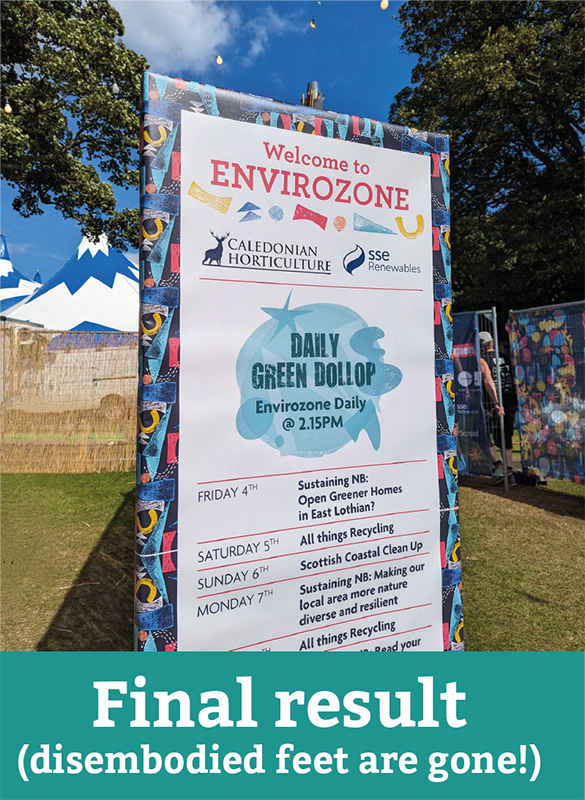
If a person wandered into your shot, or a seagull swooped into an otherwise empty sky, and you can’t retake the photo, your phone might be able to remove the problem. You usually just draw over the problem area and the magic eraser does its thing. Though there are limitations on what’s possible and you occasionally get an odd result – see the photo below where the woman has been removed, but her feet have been left behind! A second go sorted the problem, but watch out for little glitches like that, or odd results if what you’re asking is too much for the magic eraser to deal with!


Capture and use a high-res image.
Check your camera settings and see if there are photo quality options. If there are, change to capture the highest resolution photos possible. If you aren’t posting the photo directly to social from your phone avoid What’s Apping the photo, sending it via a Teams chat or compressing it in an email as it will lose quality. Instead attach to an email – selecting ‘Keep original size’ if you’re asked. Or consider uploading the photo to cloud storage and sending a link so it can be downloaded – whatever works best for the device and programmes you’re using.
